One of the first steps of becoming an official photographer is getting out of “Auto” and into “Manual” mode. Shooting in manual mode means that you have to manually set the ISO, f-stop, and shutter speed. This can often be intimidating for beginners but I promise, it’s super simple. In this video, I’m going to walk through how to set your exposure in manual mode and how each exposure setting can affect your image artistically.
Video: How to Set Your Exposure Artistically Using Manual Mode
Before we dive in, be sure to give Sabrina a follow on Instagram. For today’s tutorial, I’ll be using the Canon EOS R5 with the RF 28-70mm f/2L lens.
The Exposure Triangle
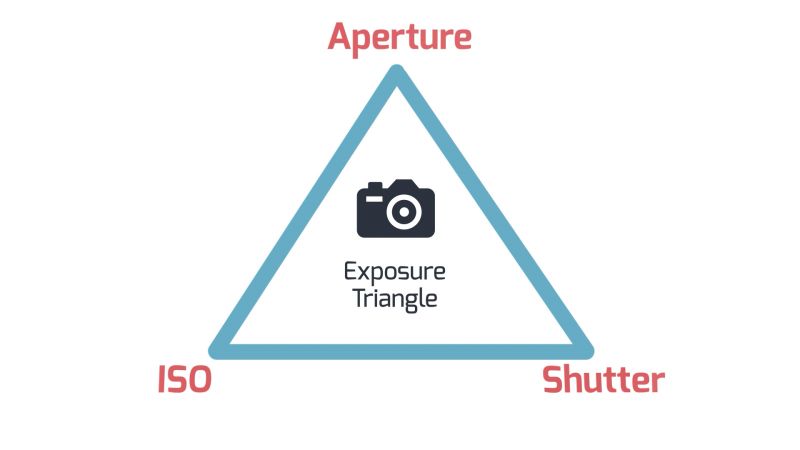
The exposure triangle consists of the Aperture, ISO, and Shutter Speed. Each of these directly controls the overall exposure, however, they also have an artistic side. Within this framework, all we have to do is think of the artistic side first. Let’s see how each setting affects the photo.
Related Reading: How to Get the Correct Exposure | The Exposure Triangle
Shutter Speed
This is the speed at which the shutter of the camera opens and closes. A faster shutter speed will let less light in. The slower the shutter speed, the more light. Simple, right? The artistic side of the shutter speed is whether we want to freeze or show motion.

If we want to show motion, we use a slow shutter speed. To freeze motion, we use a higher shutter speed.
Aperture
The aperture is the size of the iris in the lens. The smaller the iris, the less light gets through. The larger the iris, the more light. In your camera settings, the higher numbers (f/22, f/16) correspond to a smaller iris, and the lower number (f/1.4, f/2.8) indicates a larger iris.
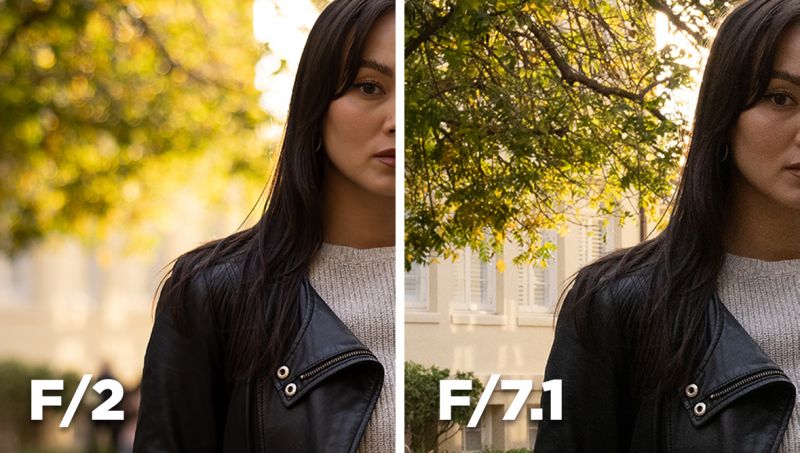
The aperture affects the depth of field. A wide open aperture captures a shallow depth of field, leaving much of the background and foreground blurred. A closed aperture captures a deep depth of field, meaning more of the image will be sharp.
ISO
Same thing with the ISO. The higher the ISO, the more light the sensor will capture. The lower the ISO, the less light. However, there is also an artistic side to this.
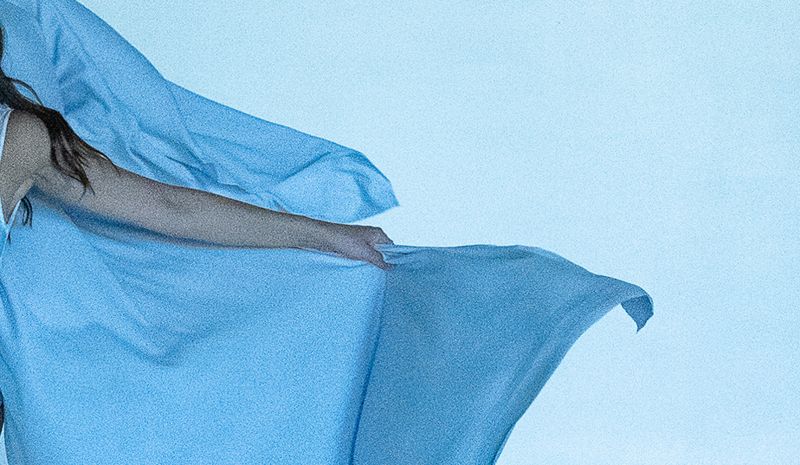
A high ISO will capture less quality in the color and detail. You’ll also begin see grain and noise. A lower ISO will capture a cleaner image.
Setting Your Exposure Settings
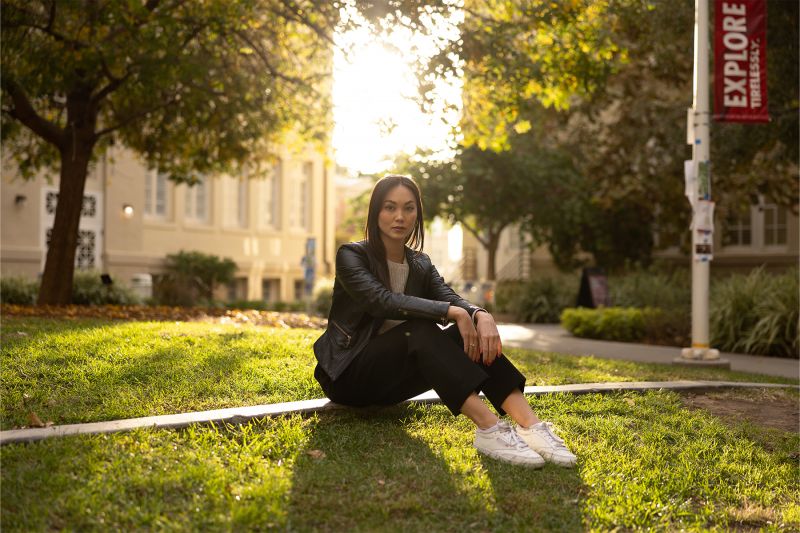
Let’s see this in action. I framed Sabrina so that she’s right in the highlight of the sun behind her.
- Think of the most important setting to capturing your specific look. In this case, the background is pretty busy. To draw more focus to Sabrina, I’ll need to create depth and blur out the background. This means that I’ll have to start with the aperture by setting it as wide as it can to f/2.
- Then, let’s look at the shutter speed. There’s hardly any motion in this simple portrait shot but I do want to make sure things are sharp. A shutter speed of 1/250 will do the trick.
- At this point, my ISO is at 100, but the exposure indicates that it’s still a touch too bright. My options are to either lower the ISO or raise the shutter speed. I opted for the latter, and set my shutter speed to 1/320.
Lastly, I used the histogram to make sure I was capturing all the highlight detail while avoiding clipping the shadows.
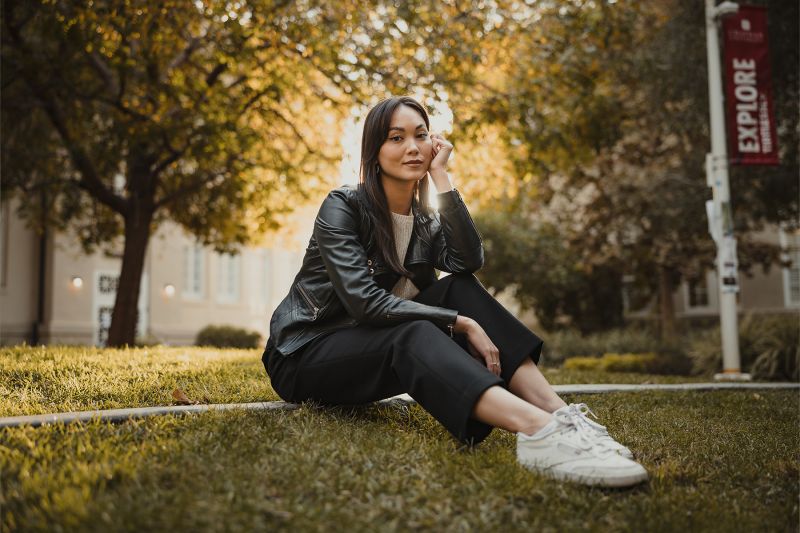
Here’s the final exposure at 1/320 sec, f/2, ISO 100.
Conclusion
Let’s review with what to ask in each step of setting your exposure.
- What is the most artistically significant setting?
- What is the second most artistically significant setting?
- Use ISO as the last piece to get the right exposure.
If you enjoyed this tutorial, check out SLR Lounge Premium where you can find everything you need to build your dream photography business. You’ll find courses such as Mastering Lightroom, Photography Business Training Course, Flash Photography Training System, and more.
You can also visit Visual Flow for our entire library of Lightroom presets and retouching tools, designed to make your editing workflow simple and seamless.
Don’t miss our next episode of Mastering Your Craft on Adorama’s YouTube channel next week! If you want to catch up on all the episodes, make sure you check out our playlist!

Get Connected!