The shutter drag portrait is one of our defining signature style photos. What highlights the shutter drag portrait is the motion we capture around our subjects. You can do this with water, cars, lights, anything. The trick is to slow the shutter down just enough to blur the movement. What you end up with is an epic portrait that’s sure to impress. In this video/article, I’ll be walking through the long exposure settings and how to capture the perfect shutter drag portrait in 10 steps.
For more tutorials from the “Master Your Craft” series, be sure to visit AdoramaTV and check out our entire playlist!
Video: Long Exposure Settings for Capturing Movement in Portraits
Shutter drag portraits are great images to catch the attention of your clients. Once you’ve understood how to create this technique, you’ll start to see motion in a whole new light. Part of our job as photographers is understanding how to manipulate and study light to create art and this is one of my favorite ways to do so.
Step #1: Choosing the Right Time of Day

I find dusk (or dawn for the bold and brave) to be the best time of day for shutter drag portraits. Specifically, right at sunset or the moment immediately after. There are a couple reasons for this. First, you’re able to get the right long exposure settings for capturing motion. A good shutter speed lands at around 1/4 to 1/2 second. To get this speed midday, you’ll need an ND filter or close down your aperture.
Step #2: Scout Your Angle

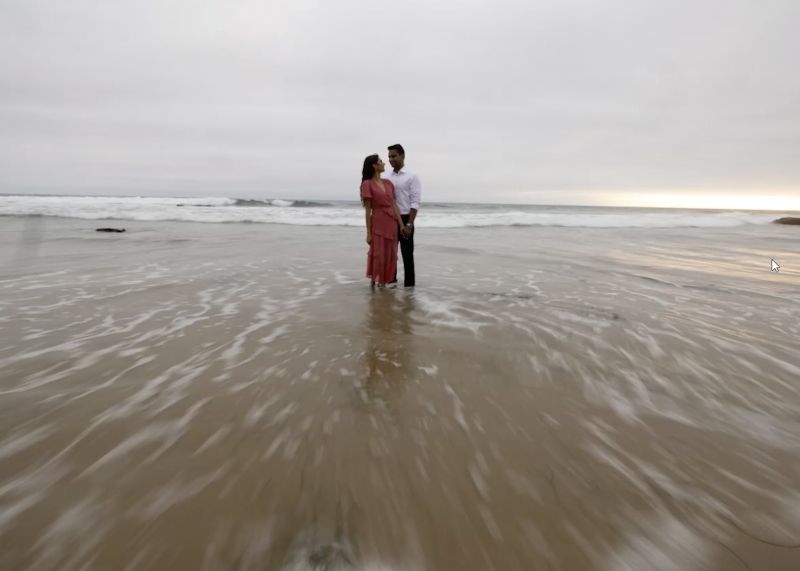
Before you bring your client into the shot, scout your location be sure of the following. First, that the client will be standing a safe place. In this location, I was looking for a place where the water would gently roll over the surface and not pose a safety hazard.

Second, look for an angle where you can capture good and interesting motion. I took these sample shots to determine which exact spot created a good direction of motion for our composition. I wasn’t happy with the way the water moves over the rocks. Instead, I moved to the sand where I knew I’d get smooth and clean motion blur.
Step #3: Place Your Tripod
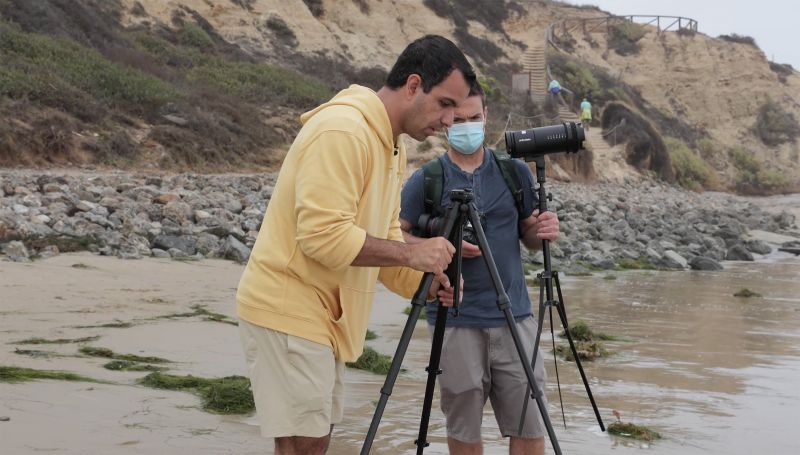
Before you set your tripod down, be sure only the bottom extension is going in the sand. This will keep it easy to clean and prevent water and sand from ruining the tripod. Also, if you’re working with wet sand, give your tripod a push once you set it down. Let it sink in just enough until it’s relatively stable. This way, the waves won’t cause the tripod to sink further during or between shots. In this scene, I’m using my trusty Peak Design Travel Tripod.
Step #4: Secure Your Camera

Make sure your camera is securely fastened to a stable head. This is especially important if you aren’t using a cable release. For most landscape photographers, this shouldn’t be a problem. However, a secure tripod head will help prevent a shaky shot.
Step #5: Use a Wide Angle Lens
My preference for the shutter drag portrait is the Canon RF 15-35mm f/2.8L lens. This wide angle lens and others like it are perfect for exaggerating the motion.
Step #6: Finalize the Composition
When I’m working with an ultra wide angle lens, I prefer to keep my subjects dead center in the frame. This prevents any distortion on your subjects. I also like to exaggerate the motion coming toward the lens. To do this, I tip the camera slightly down. Lastly, I moved the camera down to keep my subjects well above the horizon line.
Step #7: Set the Long Exposure Settings
Set your camera to the proper long exposure settings. Do this before bringing your clients or subjects into the scene. We want to aim for about 1/4 seconds. Any faster and you might not capture enough motion. Any slower and your subjects may have a hard time staying still.
Set your ISO and aperture accordingly to get as neutral of a histogram as possible. Be sure you’re shooting RAW to capture as much information as you can. Lastly, use your highlight alert to avoid clipping the image. My final settings were ISO 50, f/16, and 1/4 seconds.
Related Reading: Understanding Exposure
Step #8: Bring Your Subjects Into the Frame
Direct your clients to hold a little more still than they usually would. Be sure to explain to them the nature of the shot and what you’re envisioning.
Step #9: Shoot Through the Motion Using a High Frame Rate

Hold the shutter through the entire motion. Doing so will give you a higher chance of capturing perfect movement in at least one of the images.

Here is my favorite from this sequence.
Step #10: Verify Before You Move On
Don’t walk away just yet! The scene could be perfect from your viewfinder, but you don’t want any surprises when you sit down to edit them. Before you move anything, zoom in and verify that the image is tack sharp. Be sure to double check your long exposure settings are correct. Once everything looks good, then you can move onto the next scene.
Conclusion
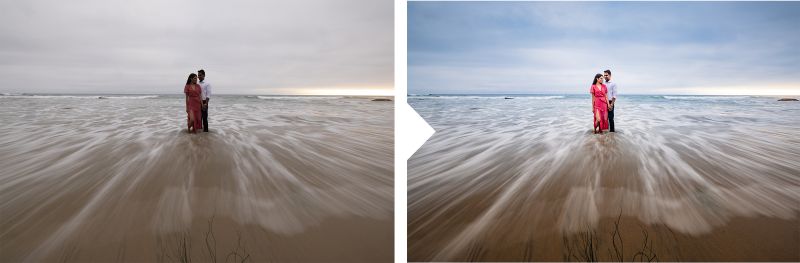
I hope you enjoyed this article/video! Next week, I’ll be walking through the entire editing process of this image and how to get this final look. To learn all about exposure settings and how you can use them creatively, check out Photography 101 from the SLR Lounge Premium Library.
Don’t miss our next episode of Mastering Your Craft on Adorama’s YouTube channel next week! If you want to catch up on all the episodes, make sure you check out our playlist!


Get Connected!